In this written tutorial for Minecraft, we will show you how you can get up and running quickly with building and designing your own Minecraft Custom Launcher using GLCV3 and the Minecraft plugin.
You must own the Game Launcher Creator V3 software and the standard Minecraft Plugin. The plugin must be installed with a valid license to the same computer as your GLCV3 installation.
Create your Launcher Design
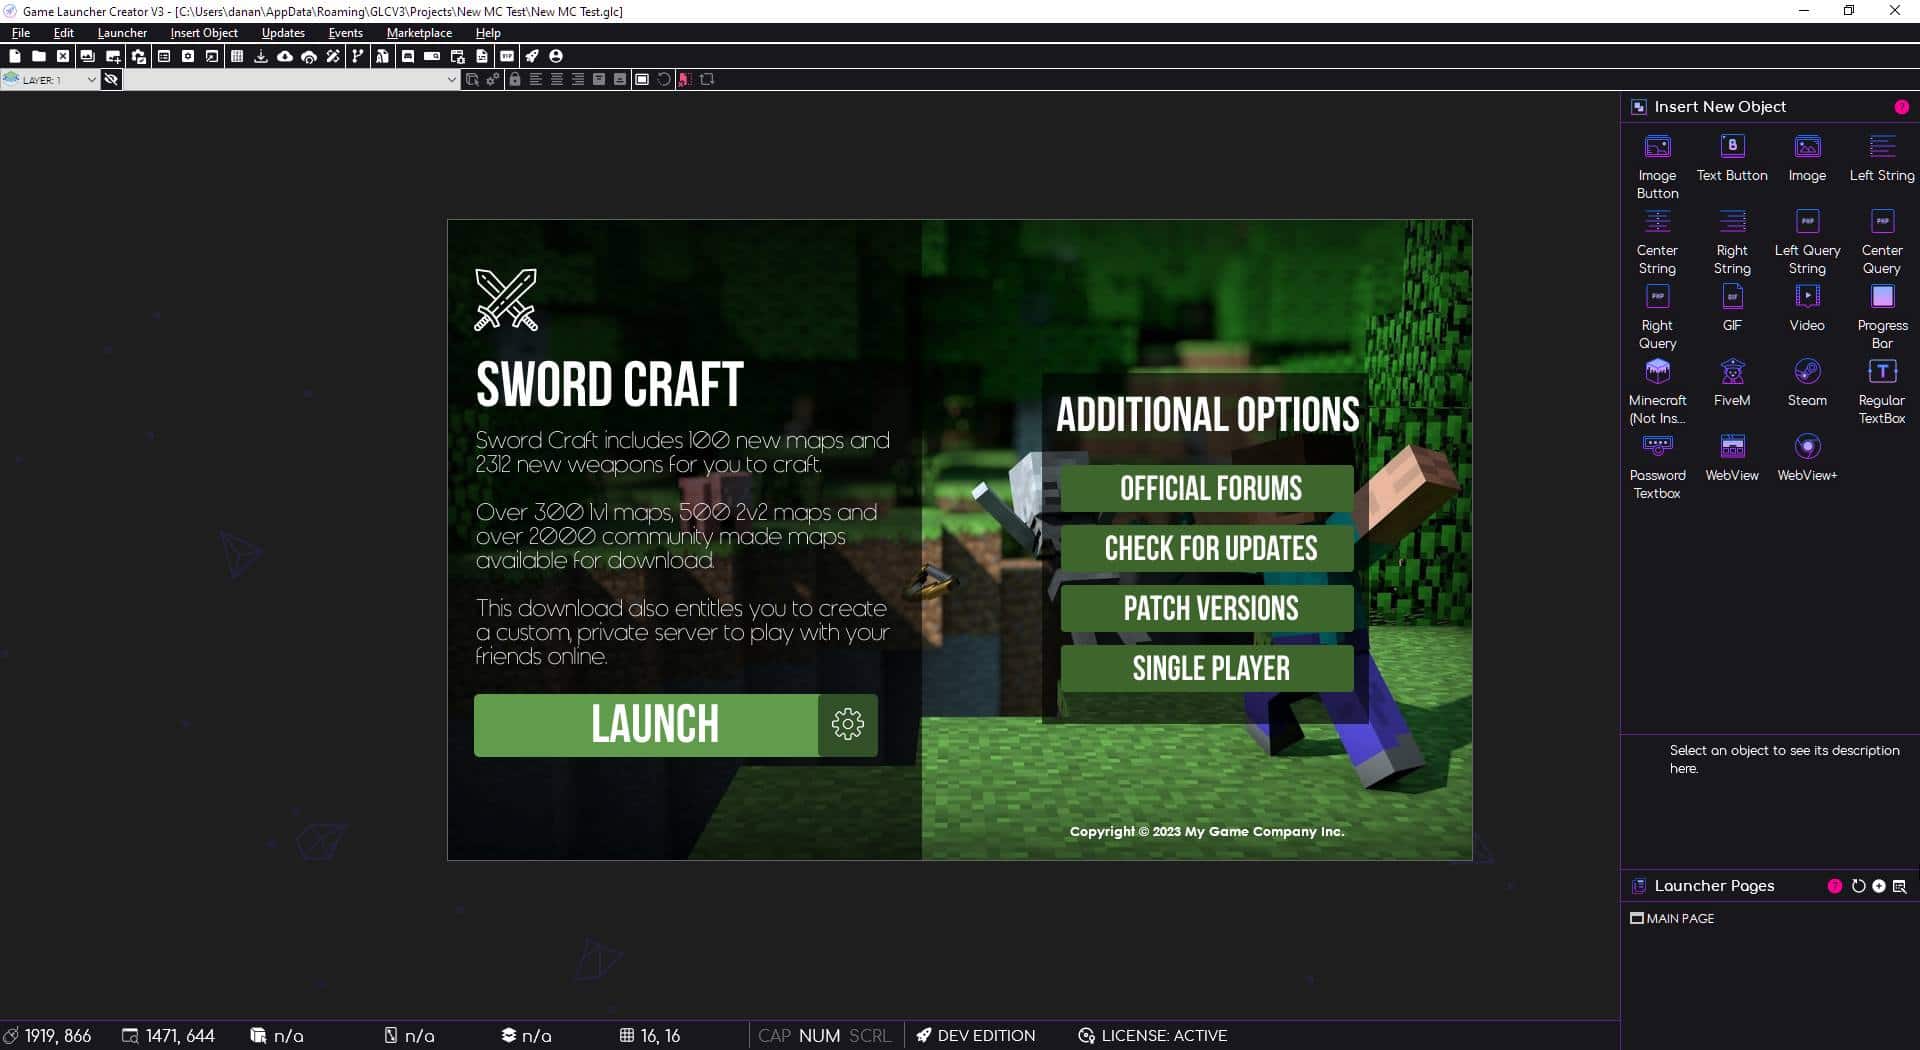
First you need to setup and create your game launcher design. You can use a pre-existing template in GLCV3 or create your own design using the editor.
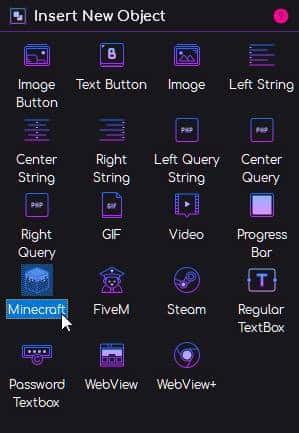
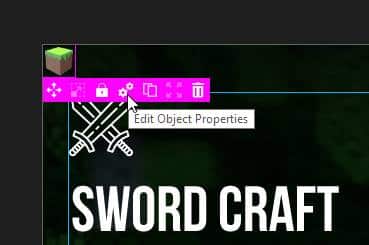
Once you have created your launcher layout, you then need to insert the Minecraft object from the Object Palette, or you can use the menu (Insert Object > Plugins > Minecraft).
Once you have done this, the Minecraft object should appear inside your launcher window at the top left. Don’t worry, this is a hidden object in the launcher. It is only visible inside the GLCV3 editor so you can configure the settings for it.
Configure the Minecraft Object
Now we need to setup and configure the Minecraft object. Simply select it with your left mouse button and hover over the ‘settings’ cog icon. Click on that to bring up the settings for this object…
Once the Minecraft settings dialog is on your screen, you can modify the settings to your server.
Click on General. Now proceed to enter the values as asked for in this settings page.
Server IP
This is where you put in your full server IP address (or hostname) for your server. Do not put the port in here, just the IP address (xxx.xxx.xxx.xxx).
Server Port
This is where you should specify the port for your Minecraft server. Default is 25565. If you don’t know it, it is probably 25565.
Server Version
You should specify here the full server version (including any mod) inside the string.
For example, if you you running a 1.18.1 Minecraft server with Forge version 39.0.19 then you would specify it like this in the version text box:
1.18.1-forge-39.0.19
With Fabric/LiteLoader you need to write them as
fabric-loader-0.11.3-1.16.5
1.12.2-LiteLoader1.18.1
Link Minecraft with Launch Button
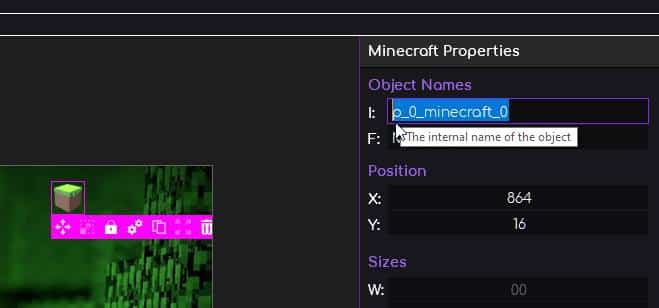
Now you need to select your Minecraft object in the editor and look in the quick property panel.
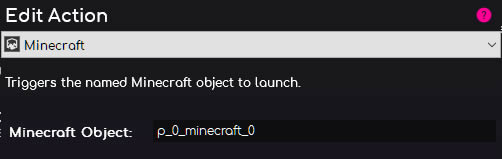
You will see an I: for the internal name of this object. You need to select and copy this internal name…
Now proceed to select your “Launch” or “Play” button in your launcher and select the settings (cog) icon to get up the settings for your button…
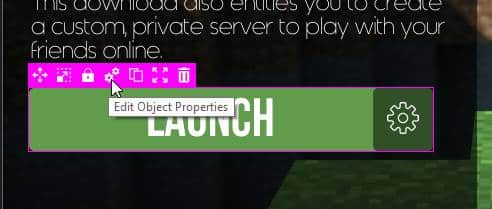
Once the button settings dialog is open, go down to Actions and select the (+) sign to add a new action…
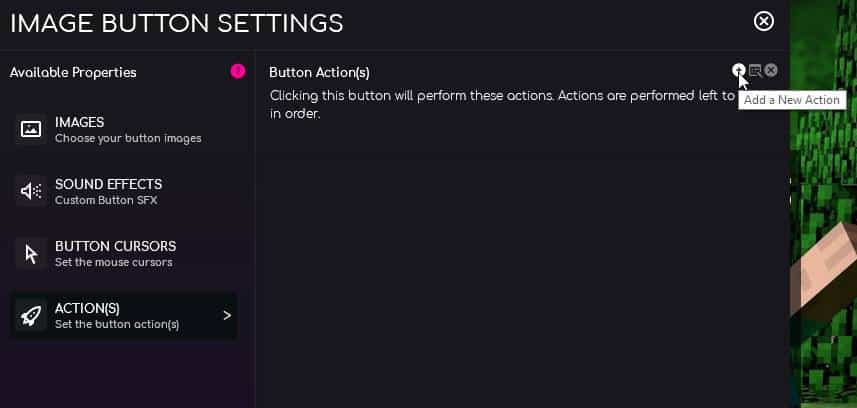
When the Action dialog appears, click the Action List at the top and select Minecraft…
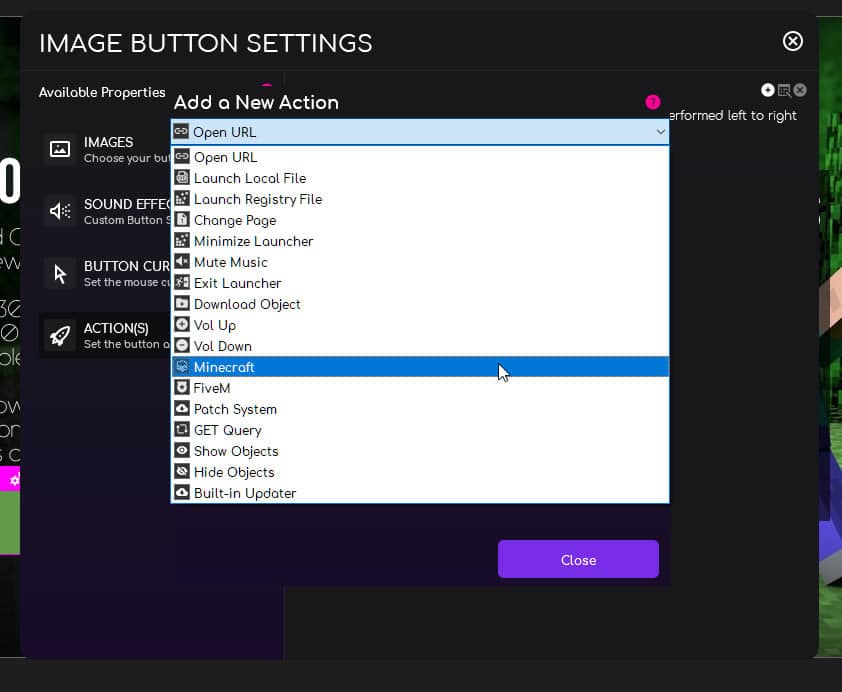
Once you have done this, a new setting will appear asking you for the name of the Minecraft object. This is where we ‘paste’ or write in the Internal name of the Minecraft Object we inserted earlier. If you can’t remember it, it is probably p_0_minecraft_0
Now your Minecraft object is linked with this button. When you build your launcher now, make sure you select ‘Minecraft Support’ from the build launcher settings…
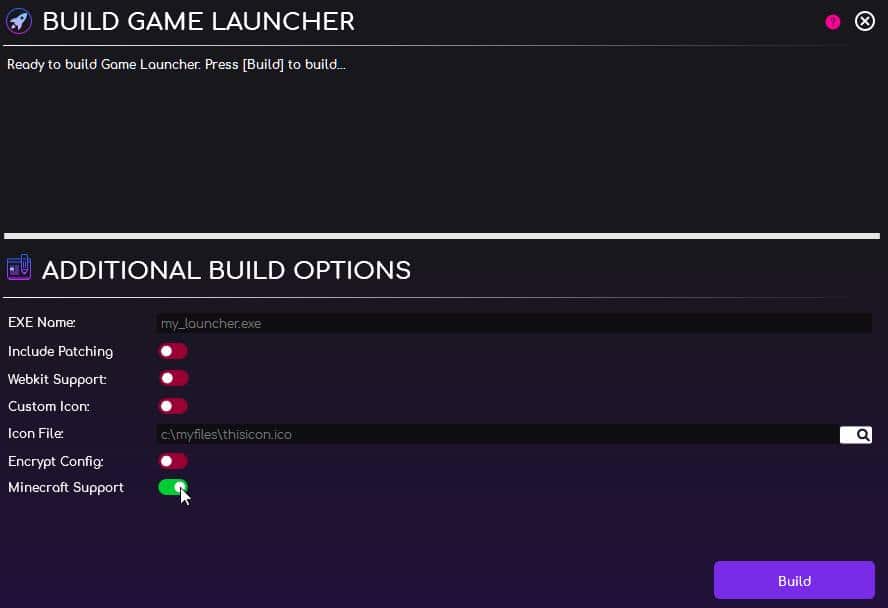
Click Build and GLCV3 will build your Minecraft launcher for you.
When your user clicks the your Minecraft launch button, it will load up the login dialog enabling them to login to the server.
Your Minecraft launcher is now complete. You have managed to link a button to that Minecraft server.
You can launch into many different Minecraft servers, you just need a Minecraft Object and Launch button for each Minecraft server.
Custom Login Screen
If you wish to design and develop your own custom login screen for Minecraft and your launcher, you will have to have or upgrade to the Developer Edition of Game Launcher Creator V3.
You can view the custom login screen tutorial here.