GLCV3 comes with a built-in template manager.
Inside the Template Manager, you can freely browse all the templates freely available for you to download and use inside GLCV3.
Installing a new template
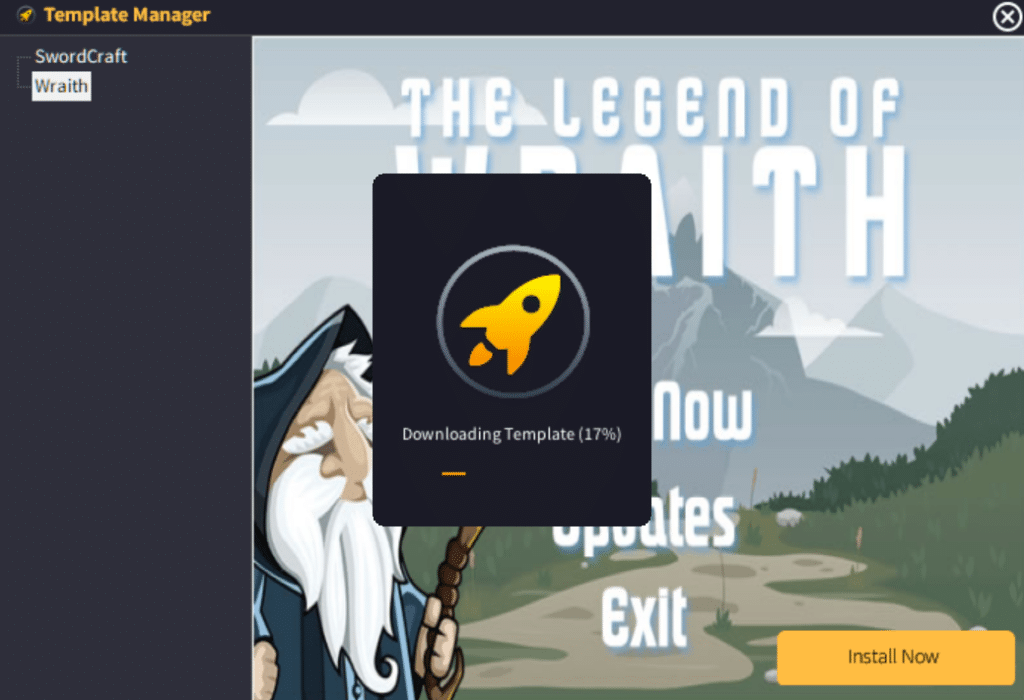
To install a new template, simply select one from the list and hit the ‘Install Now’ button. A new window will popup which will download and install the template for you.
Please make sure you keep this window active until the download finishes. Once the download has finished, the page should refresh and the template you selected will be installed.
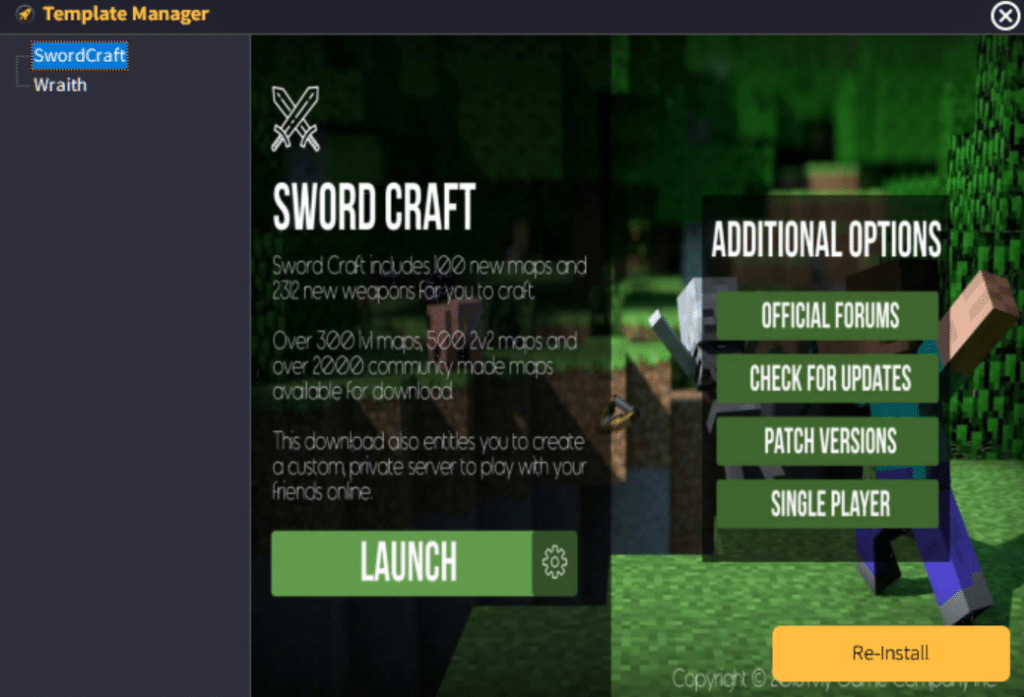
Re-installing a template
You may want or need to re-install a template if there’s any corruption, or there is an update to the template. You can simply select the template in the template manager list and click on the “Re-Install” button.
A new window will popup which will download and install the template for you.
Premium Templates
If the free templates are not tickling your fancy, you can always browse our official Store for premium game launcher templates from us and other users.
Installing a Premium Template
Once you have purchased a premium template, you should be able to download it from your Store account. Simply go to your ByteBox Media store account, go to the Order Number and click on the order number.
There should be some instructions in there. If there isn’t, try going to the Account Downloads Page instead. If you are having trouble finding the download, please contact the author of the template directly. There should be some contact information on the template store listing page. If all else fails, you can always email us about it, but we recommend you contact the template author first.
Once you have the template downloaded, it should be a ZIP file, open up the zip file. Now in a separate window, navigate to your GLCV3 installation directory, it’s usually C:\Program Files (x86)\ByteBox Media\GLCV3\ (unless you changed it on the installer). Inside this folder, navigate inside the Gdata folder then go into the templates folder. Once inside, extract the folder from the ZIP into this folder.
The structure inside the templates folder needs to be like this, see our example for Wraith template to see how everything needs to be the same…
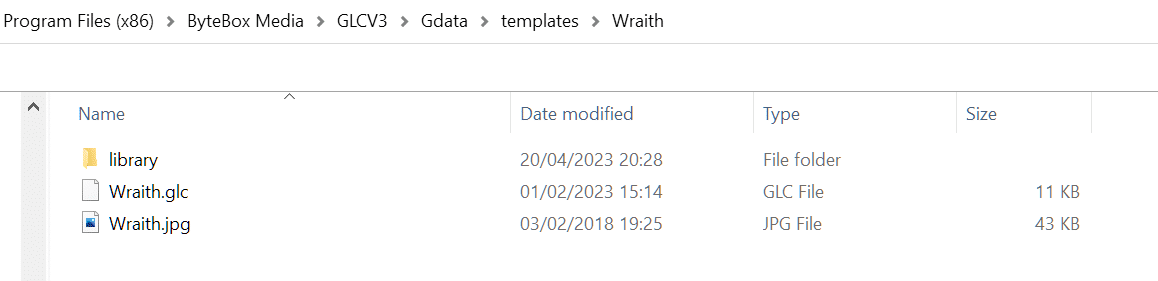
So the template needs to go in a folder called Wraith. The GLC file needs to have the exact same name… Wraith.glc and the screenshot needs to be the exact same filename… Wraith.jpg. The template should be in this exact format to be compatible with the template system inside GLCV3.