GLCV3 contains it’s very own built-in patching system called AOPS2.
AOPS stands for Advanced Online Patching System. This is the second, more faster and more efficient version, hence the 2 at the end of the acronym.
Building a patch for your game is very easy with Game Launcher Creator. Here we will guide you through a tutorial on how to perform your first patch/release for your game.
Creating a New Project
When you first open the AOPS2 Patch Builder application, go to File > New Project. Then type in the name of your Project or Game name. Then call the first version number.
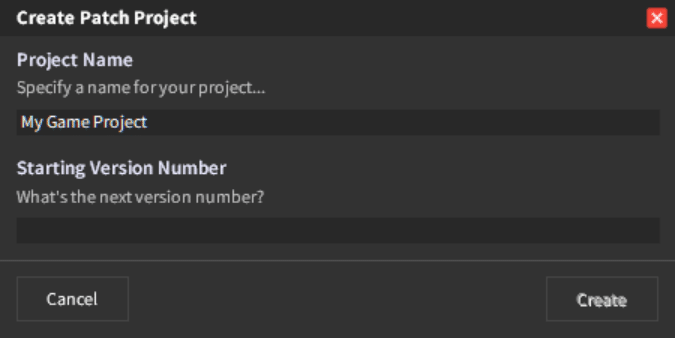
If this is the very first release of your game (initial/starting game files) then you should stipulate 1.0 in here. If you want to do some testing, you can use a number before the release, like 0.1.
Please note, throughout GLCV3/AOPS you should always use semantic versioning (xxx.xxx.xxx). Each number after the decimal can be as high as you want, but it should only contain 3 decimals. This is semantic versioning.
Patch Salt
The first thing you should always do for each version, is specify the patch salt. You can keep this the same for all versions or change it at any time. Please note, changing the salt between versions can break checksums if you don’t do a full scan for every update.
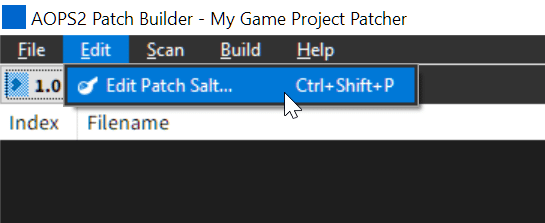
Click Edit > Edit Patch Salt. A dialog will appear allowing you to type in your patch salt. If this is your first time for this project, you should create a patch salt that is unique to you. It should be between 8 – 16 characters long and contain any random characters except | or #.
The pipe and hash characters | and # are reserved internally for AOPS.
Here is an example patch salt we have created for our project…

Create Patch List
For each version, you have your own unique patch list. This is the list of game files. Within this list, you can prepare the files before compiling the patch. You can choose from a number of options for each file which we will cover below.
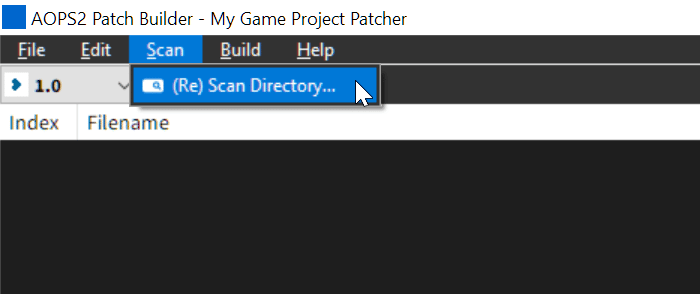
First select Scan > (Re) Scan Directory…
A dialog will appear allowing you to browse your computer to select your game files. Choose the parent folder that contains your game files…#
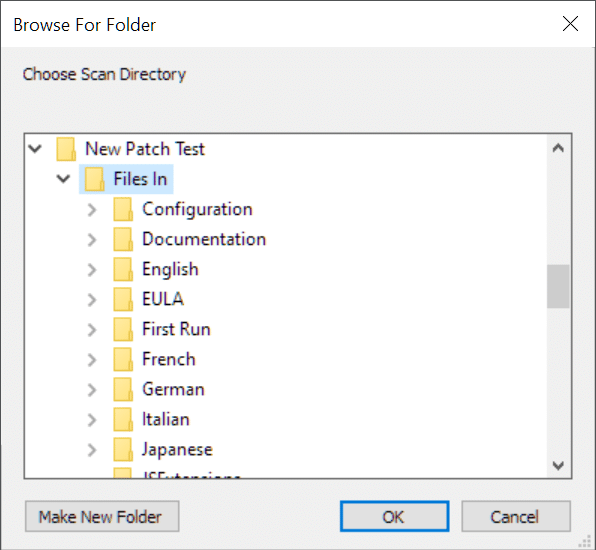
Click OK and you will be prompted with a warning. This warning is standard procedure for all new projects. You should read this warning. It is basically just letting you know that the file scan is very fast and very intensive process and you should not touch your computer until the scan has completed.
Once the scan has completed, the patch list will load inside your editor window.

The patch list contains all the files scanned, which will be every file. It will then show you the information for each file under the column headers such as the date the file was modified, the time split into hours, minutes and seconds. It also shows you the filesize in bytes and it will also display the final checksum. This checksum is generated based off this information and includes your secret patch salt you specified.
You can select a single file or multiple files and right-click and select from a few options such as
Compression (0 – 10): This is the amount of compression to apply to the file(s) you have selected.
Ignore: This tells the compiler and patcher to completely ignore the file(s) from both the build and the file check on the user’s computer. This option is included so you don’t have to delete files, you can just skip them from the final build.
Force Overwrite: This tells the patcher on the user’s computer to always patch this file with the one from your server no matter if there are any differences or not.

Build Patch
Once your version is ready and you have modified any options for any of your files, you can build your patch.
The first thing you should do is upload your patch salt to a file on your server, then specify the URL to that here. Simply create a new text file in Notepad, enter the patch salt you created earlier, save it and then upload it to your server.
Then, simply go to Build > Patch Files…
A dialog will appear with the settings for the build. Most of these fields will be automatically populated with what the AOPS builder already knows. However, you may need to put some stuff in yourself (or modify anything).
Once it is on your server, put the full, absolute URL into the patch salt section of the dialog…
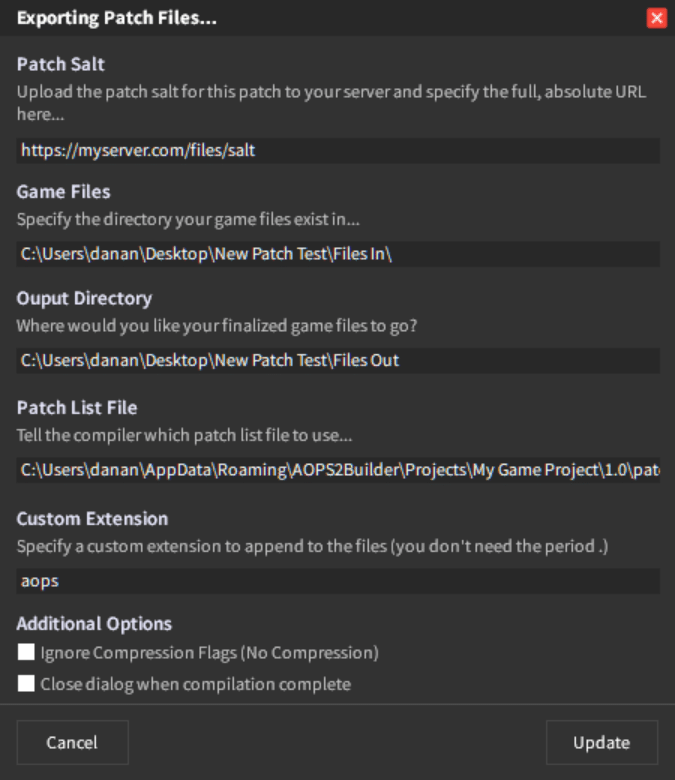
Then follow it by filling out the directory path to where your Game Files are stored (this is automatically inputted through your last scan), then type in the Output Directory where the newly compressed and/or renamed files should go into.
Then type in the path to the patch list file to use. This should be automatically filled in.
Then specify your custom extension to use.
You can then choose to ignore all the compression flags and tell the compiler not to compress any files. You can also choose to close the dialog when the compilation is complete.
Once the compilation is complete, you can close this dialog. If you want to view the patch build log, you can navigate to your %appdata% folder then to AOPS2Builder folder and inside there is a file called patch_build_log.txt. You can open this up in Notepad and read through it to see if everything went ok.
After the compilation is complete, if you navigate to where your output files are, you should see all the same folders and files as your game folder, except now the files have your custom file extension appended and if you have compression on any of those files, they should be different file sizes.
Upload new game files
Now your game files are ready for the update, you need to upload them to your server. Select all the files and upload them in BINARY transfer mode (not auto or ascii).
Update online version
Once your files have been uploaded to your server, you can now update your version number online and your launcher should detect an update.